How to Take a Pregnancy Test: 8 Easy Steps
How to Take a Pregnancy Test: In 8 Easy Steps
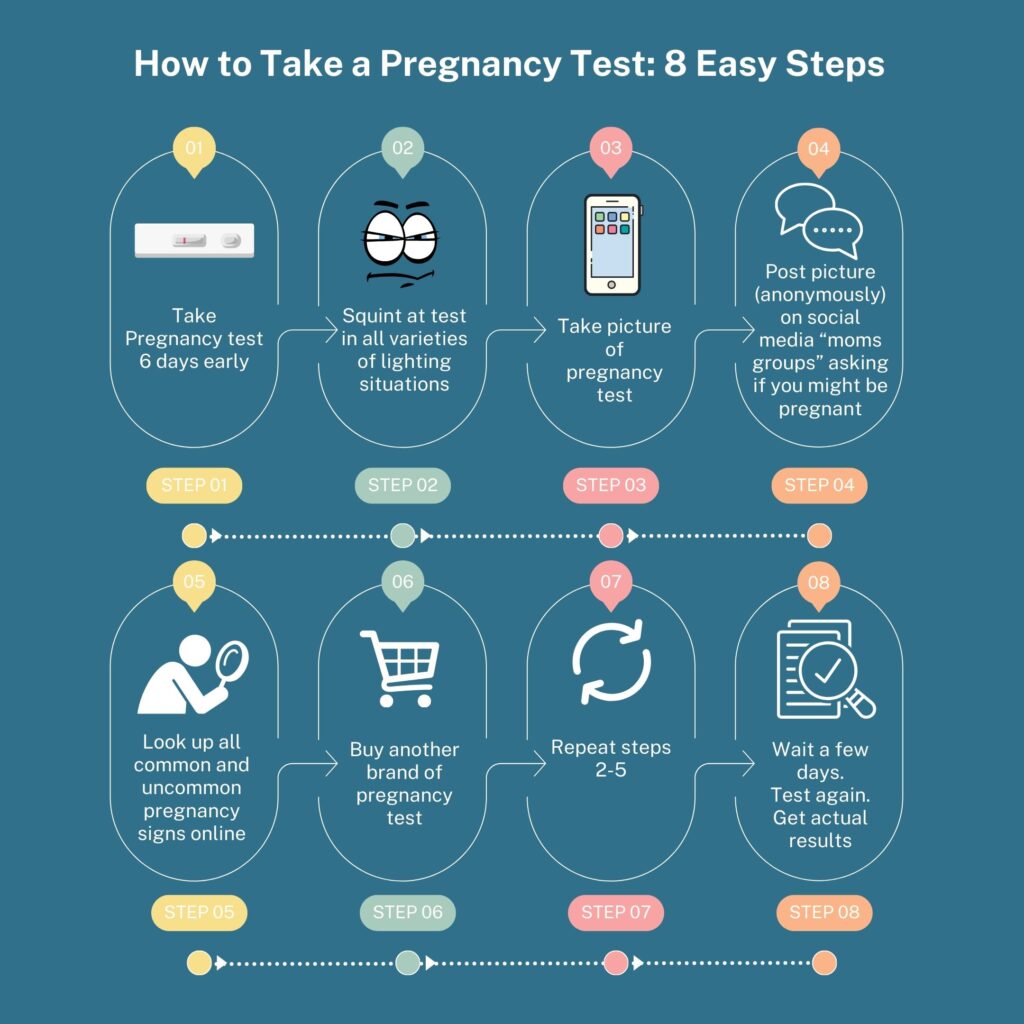
Step 1: Take a Pregnancy Test
This step should really be broken down into several, beginning with a trip to your favorite local store to purchase said pregnancy test.
Once you have navigated this tricky situation, head home and read over the directions for using your particular test. Pay careful attention to the necessary pee time. Note that the test is only good beginning 5 days before your missed period. Calculate date of missed period. Calculate again to make sure. Realize you’re still a day away from optimal testing time. Decide to test anyway.
Pee on stick, counting each second extremely carefully. Look around and wonder what you should do with stick while you’re waiting for results. Wipe up any excess urine that definitely didn’t dribble where it shouldn’t, as you have expert aim.
Note that test takes up to ten minutes for result. Disregard and immediately move to step 2.
Step 2: Squint at Test in all Varieties of Lighting Situations
Trying to determine if there is, indeed, another line on your test is the most critical step of the entire process, and spans the next few steps. I highly recommend beginning with the “squint” approach. Squeezing your eyelids together while slowly rotating the stick back and forth allows for better concentration. Adding in a few crossed-eyed moments can make that second line appear in no time flat.
As bathroom lighting is tricky, make sure to try a few different sources. Carry that stick over to the window, wave it back and forth a little. Use your camera flashlight for good measure, and then hop over to step 3.
Step 3: Take a Picture of Your Pregnancy Test
While you have your phone out (to use the flashlight, of course), take a quick snapshot with your camera. If you’d like to do some more squinting, take a quick second in your phone gallery view (and try an enhancement or two to see if you can make that line really pop!)
Another benefit to saving this picture in your phone is that you can come back and squint at it again, later. It might be different. Your eyes might be different. It could make for a different conversation when it just pops up in your gallery as you’re showing your mom another picture.
Step 4: Post in Social Media Groups
Post your pregnancy test picture (anonymously) in your favorite social media Mom’s Groups. Comment something really catchy like “Is this a line? Could I be pregnant?” Feel free to use this phrase regardless of whether or not any semblance of another line exists. Watch for the first few comments with fingers crossed! Just kidding, we don’t have time for that. Head on over to Step 5
Step 5: Look up all Common and Uncommon Pregnancy Signs Online
Use multiple search terms, like “most common pregnancy symptoms”, “could I be pregnant,” “pregnancy test accuracy,” “first signs of pregnancy”. Lie down on the couch as you do this, as you may find yourself getting VERY tired and even a little bit nauseous. Recalculate first day of last period. Calculate potential due date. Join a mom’s group for your potential due date. Mark it on your calendar.
Check your Social Media pregnancy test posts for new comments. Find multiple comments suggesting you test again in a few days. Latch onto the phrase “test again” and move on to Step 6
Step 6: Go Back to the Store and Buy More Tests
A step 6 shopper will find herself in a similar circumstance as she was in Step 1, but this time she will view the pregnancy tests with a more discerning eye. The outcome of which tests are purchased in Step 6 vary greatly depending on personality type. There are two modes of thought when it comes to the step 6 pregnancy test purchase.
Shopper A: Buys many, multiple, different brands of cheap multi-packs. Carries them with false bravado to the checkout line. Definitely hits up the personal check-out line if possible.
Shopper B: Buys 1 set of high quality tests. Stands in pregnancy test isle for 15 minutes reading about the accuracy of each brand. Holds each test box and waits for a sign that THIS is the one.
Step 7: Repeat steps 2-5
Shopper A has the luxury of repeating these steps multiple times. May end up with a headache due to squinting
Shopper B is limited in repetitions but makes up for it in quality of test. Less eye squinting. Fewer stress related symptoms.
Step 8: Test on actual day of missed period
Gets actual results. If you aren’t pregnant this month, vow a solemn vow to only purchase high quality tests next month, and to only test on the first day of your missed period. Start over at step one next month, regardless.
Disclaimer
The steps included in this blog post should in no way be considered actual medical advice on how to take a pregnancy test. Data has all been collected by observation and many, many months of personal experience. While it is meant to poke some lighthearted fun at an often sensitive topic, I would like to admit I’ve been in these shoes more times than I can count, and know what a frustrating experience it can be.
I hope I’ve brought a little joy through my silly observations, and pray for a little baby dust sprinkled your way for any of you stuck in this seemingly endless cycle.
Can you identify with any of these steps? Did I leave anything out? Let me know in the comments!


