Skip to content
Rebecca Kayne Photography
Facebook FacebookInstagram Instagram
  • Home
  • Maternity
  • Newborn
  • Cake Smash
  • Other SessionsExpand
    • Milestone
    • Princess Sessions
    • Family
    • Weddings
    • Mini Sessions
  • Products
  • BlogExpand
    • About
    • Blog
  • Contact
Rebecca Kayne Photography
September 21, 2021December 8, 2023

5 Easy Tips When Deciding What to Wear for Pictures

Client Education
Shirts hanging on a rack for the discussion of what to wear for pictures

Outfits for your portrait session- what to wear For Pictures

You’ve put in the time and investment to schedule a portrait session! Good for you! Now I want to help you choose a wardrobe that will give you exactly the kind of portraits you are hoping for. Follow these simple steps and choosing your session outfits will be a breeze!
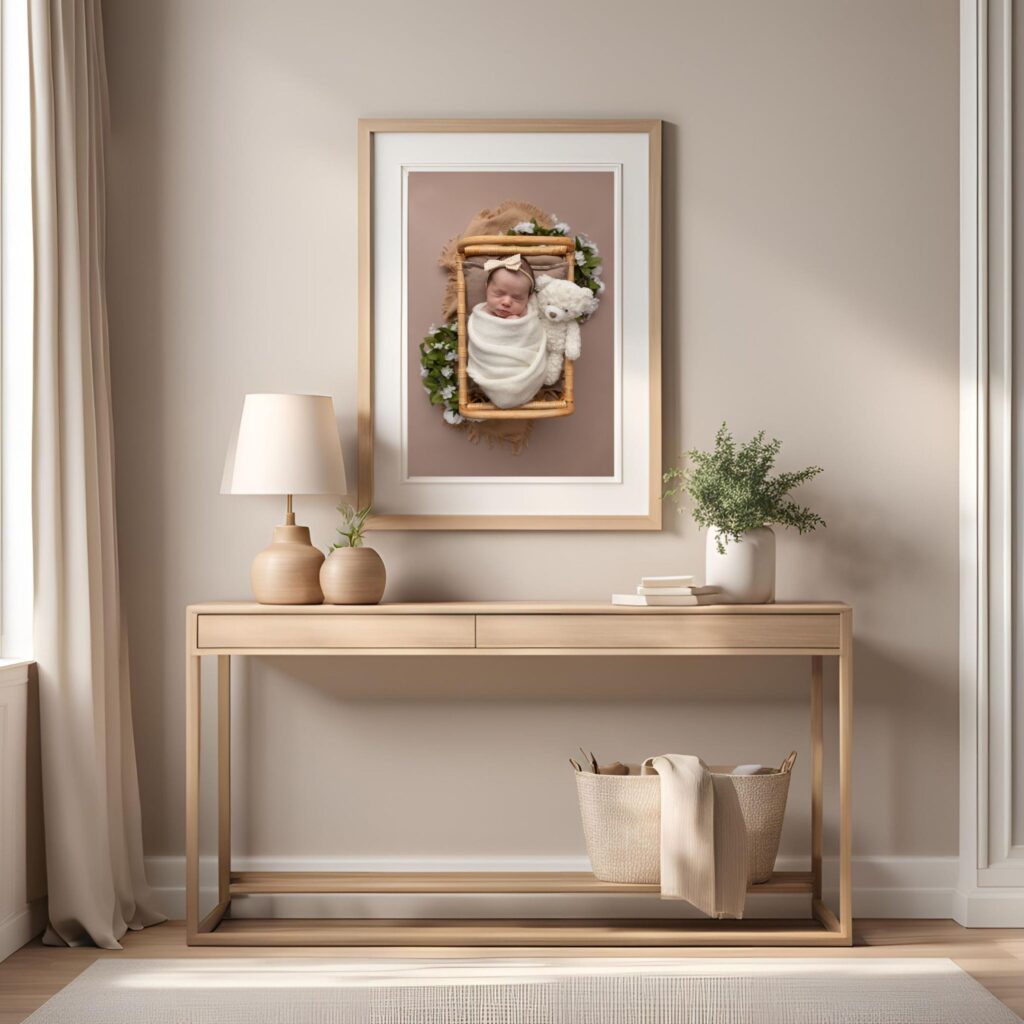
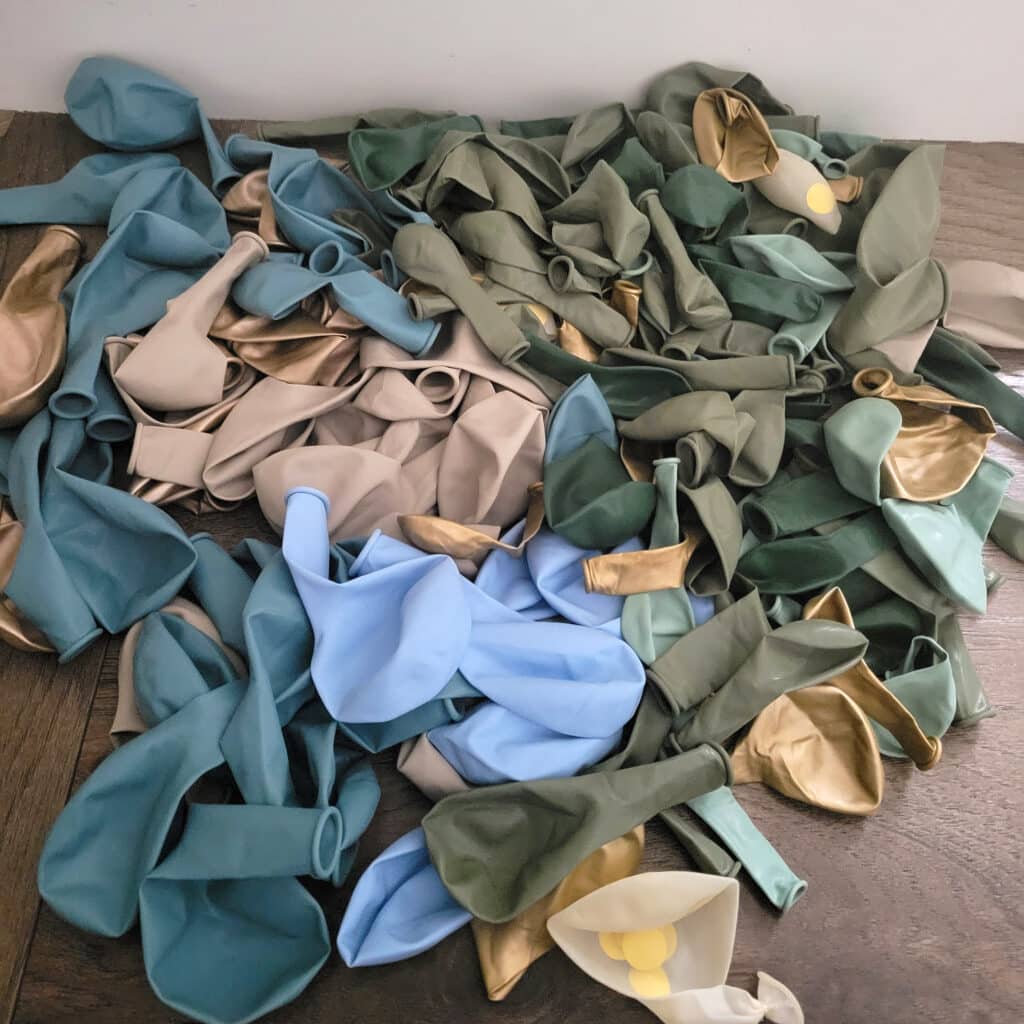

#1: Color Scheme

What mood are you looking for in these photos? Your outfits will play a HUGE role in creating the tones of your portratis.

If you are wanting something light and airy, you need to choose light, neutral colored outfits. If you’re looking for something more deep and vibrant, you are going to need to choose deeper, more vibrant colors.

If you aren’t sure yet what vibe you would like from your photos, check out Instagram or Pinterest. Start looking around and compile a small group of photos that you really love. What do they have in common? From there, you’re welcome to head over to my Outfit Inspiration Page on Pinterest. Start getting an idea of what colors look good together. Lets think 3-5 colors per family (you can get away with a couple more for larger extended families). One to two colors should be eye catching (focal) colors and the remaining colors being supporting (more neutral) colors.


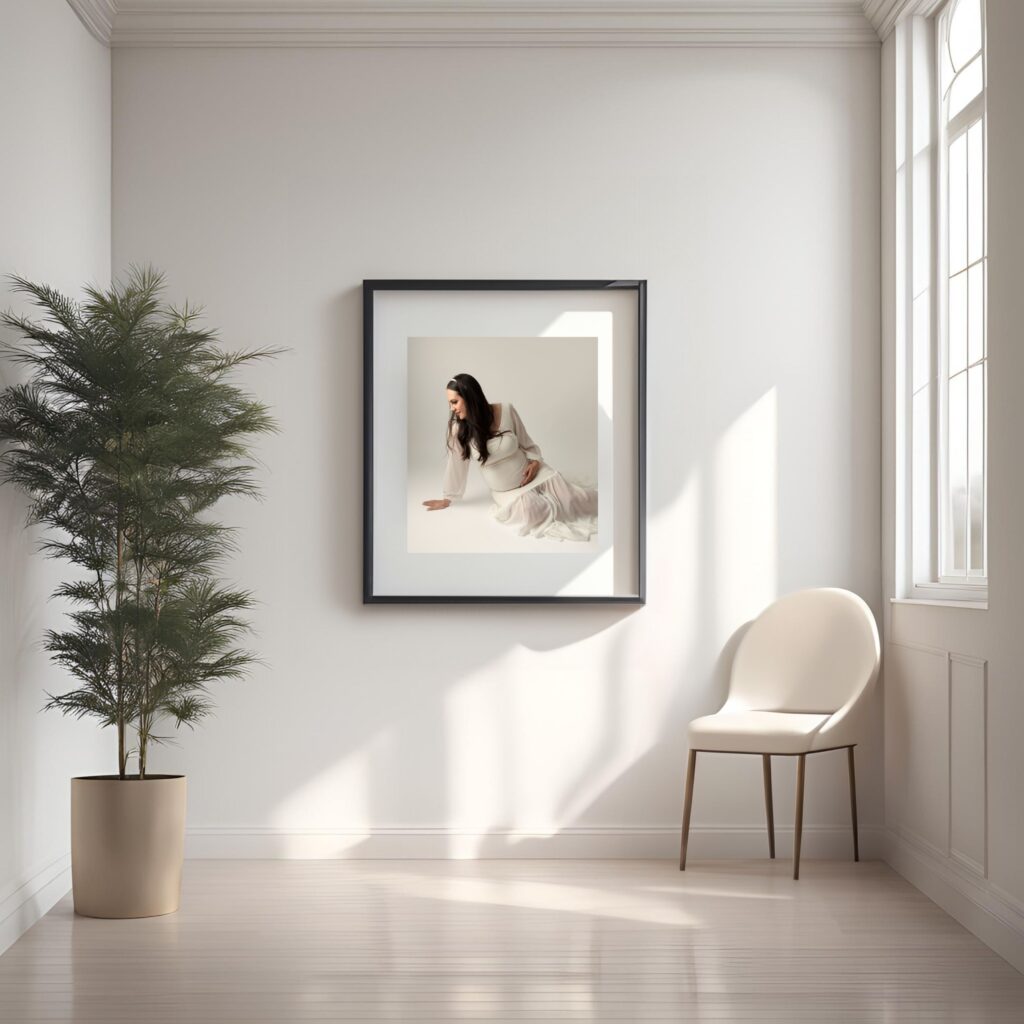
#2: Most Important Rule

I know you, Mom. You’re used to putting your kids and your husband first and that’s awesome. I’m right there with you. But I’m giving you permission…. no… I’m flat out telling you ABSOLUTELY you MUST choose your own outfit first. Don’t argue. I’m the professional. This holds true whether you’re getting ready for newborn portraits or family portraits. You’re investing in these pictures of your family. You took the time to research photographers. You’re looking for outfits. Chances are 90% of the time you’re the one behind the camera instead of in front of it with your family. Your family deserves to have some beautiful pictures with you IN them. And if you get these pictures back and you don’t LOVE how you look in them, you know where they’re going to end up? In the trash bin.

SO… Your outfit gets chosen first. Find something that makes you feel gorgeous!

A few hints to help you find something that looks great: If you want to wear something flowy then pair it with something fitted. (Flowy shirt, skinny jeans. Flowy skirt, fitted blouse). Just a quick FYI: Low cut shirts or short skirts limit the kinds of poses we can do. Don’t be afraid to accessorize! You can add a hat, necklace, earrings, belt, strappy sandals. Just make sure your outfit doesn’t have too many focal points. If you’re using an awesome accessory then keep your outfit colors/patterns neutral and simple. Take a picture or two of yourself wearing your outfit just to see how it translates in camera. Once you know what you want to wear, then you can move on to-


#3: HUBBY

Most men probably don’t care a lot about what they wear for a photo session. If yours does, that’s wonderful! Have him join you in picking out outfits for himself and the kids. Otherwise, narrow it down to a few options and let him decide.

For men, I always suggest something fitted. Baggy clothing is out, and a little dressed up is better than too casual. For casual sessions, I recommend a button-down shirt with sleeves rolled to the forearm or elbow or a sweater. You can pair this with jeans and some nice shoes (not sneakers). For more formal portraits I would suggest a blazer- you can accessorize with a tie, belt, suspenders, boots.

If your husband absolutely doesn’t care what he wears, then feel free to choose the kids outfits first and come back to his at the end.
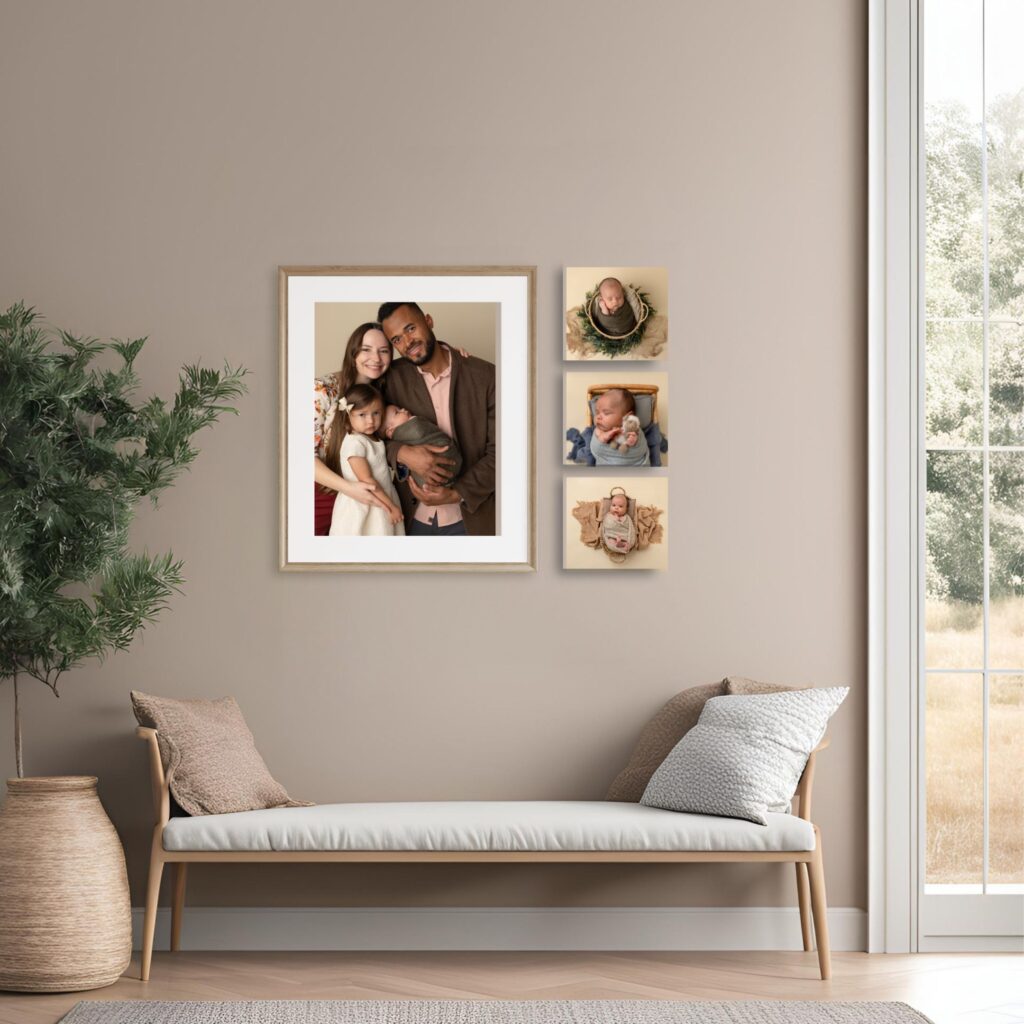

#4: Kids

This is where your color scheme really comes into play. Use your kid’s outfits to pull in the colors in your palette. Be sparing with patterns (maybe one focal pattern in the family). When it comes to patterns, bigger is better! Small, tight patterns sometimes get weird in camera. Use accesories to help pull in some of the other colors you’re using.

Kids are similar to dressing adults but I’ll add a couple of things to watch for. Try to stay away from anything with pictures/logos. They’re just distracting and you want everyone’s attention on those cute FACES. For the same reason avoid sneakers that are colored. I always prefer dress shoes but if you must bring a family member in sneakers, make sure their colors are neutral and non-distracting.

For little girls in dresses I strongly recommend a pair of bike shorts underneath in a matching neutral color. You moms of girls hear me. You know exactly what I’m talking about.


#5: Shoes

While shoes seem like an afterthought, they can make or break your portrait session. In general, we don’t want to even notice them! When you show your portraits to your family and friends, you want them looking at your cute family and your kids sweet faces. A bright pair of shoes will pull that attention directly down to the bottom of the portrait, away from where we want the focus to be.

I always recommend going with more formal shoes than casual. Typically we don’t want to see anyones toes (unless mom is sporting a pretty pair of heels), and we definitely don’t want to see any bright sneakers. Stick with neutral colors. Sunday shoes are a great option. If you don’t want to spend a lot of money, this is a great time to bargain hunt at a thrift shop like kid to kid or uptown cheapskate.


Where to Shop

There isn’t really a right or wrong here. I’ll just share a few places I recommend.

I’ve found some great outfits for my family on Amazon.com. I especially love their Try Before You Buy program- clothing that is a part of this program will be labeled as such. They’ll ship it out and you have a week to decide if you want to keep it. When we had our OWN family photos I chose a few outfits for myself and my husband and simply returned the ones we didn’t use.

Joyfolie has really beautiful dresses for girls. They periodically run sales, so if you time it right you can get a great deal. My girls always get compliments on their dresses from here.

Baltic Born is a great one for mom. They have a huge selection of clothing, whether you want a dress or something more casual.

H & M has very cute kids clothing in more neutral colors. I tend to enjoy their actual store more than their website.

If you have a store you think should be added to this list, please let me know!


Keep in Touch!

I’m SO HAPPY to look over your outfit choices as you’re in the decision-making stage. Seriously. Send me a text or email with some pictures and I’ll 100% let you know what I think will work best. I want you to be as happy as can be with your portraits, and a big part of that is choosing really awesome outfits for your family!

DON’T HAVE A SESSION SCHEDULED YET? CONTACT ME AND LET’S GET YOU ON MY CALENDAR!


Post Tags: #Education
November 20, 2025November 20, 2025

Wedding Questionnaire

Uncategorized

This form will take 10-15 minutes to complete. There’s no way to save your answers and return, so make sure you have all necessary info before you start.

November 20, 2025November 20, 2025

Wedding Contract Form

Uncategorized

Please fill out the form below with all of the information I’ll need to create your wedding contract.

April 28, 2025April 28, 2025

Why Print Your Photos? 8 Important Reasons to Abandon Your Digital Files

Client Education

Why Print Your Photos?


why print your photos and where to print your pictures

When a potential client calls, one of the most frequent questions I get asked is, “Can I just get the digitals?” And honestly, I totally get why you’d ask! We’re all so used to living on our phones these days. But if I’m being real with you, just handing over a folder of files would feel like I was only doing half my job.

Your photos deserve more than a quick scroll and a spot in cloud storage. They deserve a real place in your home, where you can see them, feel them, and smile every time you walk by. That’s why I’ve built my business around helping you turn your favorite memories into beautiful, lasting prints and products. And that’s why my clients come back and thank me for providing them with this service.

So the short answer is no, I don’t do simple digital packages (and if I do, they’re much more expensive than my standard packages). Every one of my sessions includes a minimum purchase amount, which must be spent on physical products following the session.

Let me tell you why printing your products makes all the difference.


1. Bring Your Photos to Life

Enjoy Your Photos Every Day

Professional photo products are an investment! Especially if you purchase more deluxe items like canvases, metals or albums. I have been there and have felt the same worries over budget and the cost of printed photos. Last year we had our own family photos done, and I decided to make the leap and purchase metals with our photos- and not just one, but a gallery wall. At the time I was so torn over whether we should pay that much for our wall of photos. I am grateful every day that we did!

They hang in the main room of our home, and we each see those photos dozens of times a day. Every time I look at them, I am in love. Both with the quality of the photos, thanks to our wonderful photographer, and with the quality of the wall art, because I used a professional photography lab. For the cost of going out to dinner a couple of times, we get to look at these beautiful portraits of our family every single day for years to come.

Beyond the Phone Screen

Digital images often get shared on social media and are then forgotten. Ask me how often I sit and scroll through past pictures on my phone with my kids… the answer is never. But they frequently pull out their own albums and look through those photos together. They sit and laugh and talk about all of the memories we’ve captured through the years. They love to see how they’ve grown, and they giggle over each other’s baby photos. As I mentioned in the last section, we have a wall of family photos that we look at EVERY SINGLE DAY, and it reminds us of the importance of our family and how much we love one another.


2. Boost Children’s Confidence and Well-Being

Children Feel Loved and Valued

When you display family and milestone photos in your home, you’re doing more than decorating—you’re sending a powerful message to your children. Seeing their own photos displayed prominently in the home shows children that they are an important part of the family story. It reinforces the idea that your family matters and helps create a sense of belonging. Studies show that children who grow up in homes with family photos on the walls have a stronger sense of belonging and security.

Build Self-Esteem

Displaying your child’s photos helps them internalize that they are cherished and celebrated, boosting their self-confidence. Knowing that they are valued gives them security. These printed memories create emotional anchors that help build confidence over time—something a forgotten digital file simply can’t achieve. Daily positive reinforcement of happy moments reinforces positive memories and contributes to emotional resilience.


collage wall mock up for utah newborn photographer to share with clients

3. Heirlooms for Future Generations

Why Print Your Photos? Create Lasting Legacies

Do you know what photos we have of my grandparents? We don’t have any of the photos they took in the years they relied on their phones as their cameras. Not one single photo from their camera rolls made it into our home. We DO have several photos that had been tucked away in boxes and albums, waiting for the day we happened upon them as we cleaned out their homes.

Isn’t that amazing? I don’t have one photo from the thousands upon thousands of photos I’m sure were sitting in phone files somewhere. I DO have a copy of my grandparents’ engagement photo on a collage in our hallway. I have an old family photograph from when my dad was a teenager. On the other side of my family, I have an entire wedding album from my grandparents (they bought several to pass along to their children… thinking ahead when they got married). And it isn’t just the important milestone moments we’ve kept. I also have a photo of my great-grandpa sitting on a porch swing with my mom. I’m so glad that my grandparents printed these photos and kept them for decades, so that they could end up in my home and connect my children to their ancestry.

There’s just something special about physical products. I’m grateful for digital copies of photos that we could potentially use someday. I’ve been known to look up old photos for calendar gifts or slide shows. But while I will let my hard drive sit in a drawer gathering dust, printed products that are more than 50 years old enjoy the spotlight in our home. These products have so much more emotional impact than a photo on a screen.


Why Print Your Photos Through Your Photographer?


4. Access to Professional Products and Expert Guidance

One of the biggest challenges clients face is figuring out where to print their photos. With so many consumer options out there, many of which produce low-quality results, it can feel overwhelming and frustrating. As a professional photographer, I have access to exclusive, high-end print labs that work only with professional photographers, ensuring that every product meets the highest standards of quality, color accuracy, and durability.

I also provide samples of the products I offer, including albums, wall art, framed prints, and more. It’s important to me that you can see and feel exactly what you’ll be getting before you make your selections. We can even put your photos up on a wall mock-up during your gallery reveal so you can see how your layout will look in your house, selecting the pictures that best complement each other. This way, you can feel confident knowing your portraits will look beautiful in your home.


why print your photos acrylic frame with matted photo to switch out

5. Customization Tailored to You

Many of the products I offer have different styles, sizes, fabrics, and finishes. When you order your products in my studio at your gallery reveal, you can see these options in person and get a better feel for what fits your family’s style. You can compare them side by side, see their colors as they truly appear in person, feel their textures, and see how they react to light from multiple angles. There’s just no replacement for seeing print products in person before you purchase them.


utah maternity photographer album with maternity photo on front cover

6. Access to Quality Products

Professional print labs make a huge difference when it comes to your photos. They use top-quality papers, rich inks, and carefully calibrated printers to make sure your images look exactly how they’re supposed to — with true colors, sharp details, and a beautiful finish that actually lasts. Unlike quick consumer labs that rush prints through for speed, professional labs hand-check everything for quality and accuracy.

Plus, the prints they create are made to stand the test of time — no weird fading, discoloring, or bending after just a few years. If you’re investing in professional photography, your memories deserve to be printed the right way — beautifully and built to last. The archival quality materials used by professional printing labs are specifically chosen to create long-lasting works of art. Even the lowest-grade portraits I order from my favorite printing lab have a 100-year “shelf life” when placed in full sunlight.


why print your photos adorable pink themed baby portrait in a frame in the hallway

7. Getting it Done

One of the most common stories I hear from clients is the story of the session never printed… It’s completely understandable! I’ve been there, too. The focus is on the session- choosing outfits, getting haircuts, and ensuring kids smile. We reach the end of the session, view our photos, breathe a sigh of relief that it’s all over, and vow to order our prints tomorrow. Tomorrow comes and goes, followed by a few months of extra tomorrows. Then suddenly you realize it’s been two years and those photos are outdated anyway.

It happens all the time, and what a tragedy to go to all the work and expense of getting professional photos, only to never really get to enjoy them. This is one of my very favorite things about having a gallery reveal and ordering appointment for my clients! We plan this to take place 1-2 weeks following your session, and sit down together to choose your products. Sometimes I have clients worry that they’ll waste my time because they’re so indecisive, but these are the very clients who benefit the most from having a gallery reveal. I’m happy to throw in my input as a professional, and you don’t have the weeks of stress you’d normally endure in the decision-making process.


why print your photos? gallery wall with family and kids

8. Reducing Stress and Enjoying An Elevated Client Experience

My goal is to make your client experience as stress-free and seamless as possible. From your session to your finished product, everything is taken care of. You don’t need to spend hours researching where to print your photos- finding the best consumer printing lab and then crossing your fingers that your prints turn out like you hope. You’ll see exactly what you can expect, in physical form, before you even order.

I take care of your research for you, giving you access to the very best labs (only available to professional photographers). I am constantly on the lookout for new, fun products and order the samples so you don’t have to! Only the best products and labs make it through my testing process and into my product catalog, saving you the time and money required to do this kind of research yourself.

We’ll walk through choosing the best photos for your walls or albums together, you can see a mock-up, and then you pay and walk away! Your order will be delivered to your front door in a matter of weeks, ready to display and enjoy in your home. The only thing left for you to do is to hang it on the wall!

wall portrait of a pregnant woman utah maternity photographer

This is all great information, but I still just want digitals…

I get it! There are definitely times when all I need are some digitals as well. The good news is that there are PLENTY of photographers out there who will deliver just what you’re looking for! You and I may not be the best fit, and that’s ok. I choose to run my business with the end result being print products, because that kind of service brings me joy and fulfillment. It’s not what every client needs, and it’s not what every client needs right now.

I LOVE burgers and fries. I love going out to eat burgers and fries, and we have a bunch of local favorite places to order them. Sometimes I need a quick bite, and Wendy’s is right down the street, so it’s perfect for that moment. Other times we have a little more time and money, and we go to Chom or Seven Brothers or Chubbys! And sometimes we just want to splurge on a really good steak and fries, and we head over to Outback Steakhouse.

I love all of these places, at different times and for different things. But I’m not going to drive up to Wendy’s and demand a steak (or expect it to taste like it came from Outback). I’m also not going to go to Outback and say, “This is all really nice, but I actually only need a $5 burger.”

This is a little tongue-in-cheek way of saying that my business is what it is because of the attention to detail that I offer. I’m so glad you love my photographs and you want that for your own family! And I’ll be happy to serve you that luscious steak with yummy fries that I offer to all my clients. If a $5 burger fits your needs and budget better right now, then I promise there are plenty of fast food photographers who are happy to deliver you a phone full of digital files. And when you’re ready for your steak, I’ll be here ready to be your photographer!


Where have you been all my life? I want this for my family and can’t wait to book a session!

I’m so happy to hear it! I can’t wait to help you get gorgeous photos of you and your loved ones, and to get those photos in albums and wall art where they can be enjoyed by your family and friends!

To schedule your session, just reach out through my contact page and let me know a few details about what you’d like to schedule. I’ll be in touch shortly to answer any questions, and I’ll email over a booking proposal with my calendar, packages, and contract all attached. Once you finish the booking proposal, you’ll be on my calendar! You’ll receive a welcome email, access to your personal client portal, and helpful emails along the way until your session date arrives.

Contact ME
April 24, 2025November 19, 2025

How to Make a Balloon Garland: Easy DIY Balloon Arch Tutorial

Education / Photographer Education

How to make a Balloon Garland (and Arch): Step-by-Step DIY Tutorial

Planning a party or special event? Whether you’re going for a whimsical, free-flowing balloon garland or a show-stopping balloon arch, these stunning balloon decorations instantly transform any celebration. In this guide, I’ll walk you through how to make a balloon garland (balloon arch) step-by-step—perfect for birthdays, weddings, showers, or just adding a little magic to your space. With a few simple tools and some creative flair, you can create a professional-looking DIY balloon arch right at home.

As a Cake Smash Photographer, I’ve had plenty of experience setting up Balloon Garlands for sessions. The best news is that creating a balloon garland is actually quite simple. It does take a little bit of time, but the outcome is well worth the investment.

Here’s a quick video walk-through of my process, followed by a step-by-step and some helpful hints to get you on your way.

Step-by-Step Video of Creating a Balloon Garland


Balloon Garland vs Balloon Arch — What’s the Difference?

If you’re like me, you’ve heard both terms and you’re not really sure which one you’re using. Here’s a quick break-down.

  • Shape & Structure — A balloon garland is flexible and organic, draping across walls, tables, or staircases. A balloon arch is more structured, usually built on a frame to create a curved or circular focal point.
  • Effort & Materials — Garlands can be made with just a balloon strip and tape, while arches may require a sturdy frame, fishing line, or even PVC pipes for support.
  • Visual Impact — Arches make a dramatic entrance piece or photo backdrop, while garlands add soft, flowing color to any area.
  • Occasions — Arches are perfect for doorways, outdoor ceremonies, or statement décor. Garlands are great for accent walls, dessert tables, or wrapping around existing structures.

I use both. Sometimes I drape the garland along my backdrop, and sometimes I hang it in an arch. Really, the setup is almost exactly the same.


Creating a Balloon Garland: Gathering Necessary Items

There are only a few things you really need in order to create a balloon garland. Here are the items you’ll see in this video.

Balloons

I like to create my balloon arches with about 2-3 main theme colors, along with 3-4 supporting (more neutral) colors. You can do this however you would like. You could even make a balloon arch with a single color! I find most balloon arches I see have multiple. You can find your balloons as a kit on Amazon (just search for them, there are a lot out there). Or you can create your own variety.

One benefit to creating your own mix is that you can get larger balloons. After using a bunch of kits from Amazon, I found that I was ending up with a lot of leftover smaller balloons. I have found that my favorite size balloon for my balloon arches is 12″. My ultimate balloon arch happy place is a set of 12″ balloons to work with, along with some 6″ balloons to even it out along the way.

balloons for how to make a balloon garland

What if you’re not making a bunch of balloon arches like I am, but you just want to make one for a party and be done with it? GET A BALLOON ARCH KIT and call it good enough! I really love using a set of bigger balloons, but you can absolutely get by with a pre-made kit.

How many Balloons do you need for a balloon arch?

I tend to use about 80 balloons for my balloon arches, which are the perfect size for a cake smash session. You don’t want the arch to be too big, because you want to see it all (or at least most of it) in the shot. If you want a larger arch, maybe for party decor or something else, you’ll need to use more balloons.

Balloon Arch Tape

There are plenty of people out there who swear by using string or some other contraption to hold their arches together. To each their own, but I’d much rather just use a roll of balloon arch tape and save myself some stress. This usually comes in those pre-made kits I talked about, but you can also buy a box of these to have on hand. They’re super cheap and in my opinion completely worth it.

balloon arch tape

Balloon Pump

Unless you have the lungs of an elite athlete, I would also strongly recommend getting a balloon pump to fill up all those balloons. I own this nifty little guy, and it’s not only super easy to use, but the cord tucks inside and it stores really well, too.

balloon pump for making a balloon arch

Stretchy Twine/Fishing Line

I like to hang my balloon arch with stretch bracelet/fishing twine. It makes it almost invisible in photographs, and does a great job of holding the arch up just how I’d like it. I bought mine from Hobby Lobby, but you can find it at pretty much any craft store, Walmart, or Amazon.

stretchy twine

If You Make a Lot of Balloon Garlands (especially for Cake Smash Sessions)

Quilting Clips

This is the way I like to hang my balloon garlands for Cake Smash Sessions. I like to use a backdrop stand so that my balloon arch stays lower to the ground. This way the balloon arch is nice and visible behind the toddler. Since I do a lot of these sessions, I keep my stretchy twine tied to the horizontal bar of my backdrop stand. Then I use quilting clips to attach my balloon arch to the twine. This allows me to re-use my stretchy twine, and is faster because they’re already hung to be about the right relative height from one another to make a pretty arch shape.

quilting clips

How to Make a Balloon Garland: The Steps

1. Blow up the Balloons

I like to blow up about 5 of each color consecutively. That way I know I have about an even number of each color. For a Cake Smash-sized balloon arch, I typically need somewhere around 80 balloons. About 1 in every 4 or 5 balloons needs to be a small one. This won’t make a big difference right at the beginning, but as you keep adding balloons to the balloon arch tape, you’ll notice that they bunch up and you’ll either need to start skipping holes or you’ll need to add some small balloons.

2. Add Balloons to the Arch Tape

The arch tape will usually be secured with a piece of regular tape. Take that off and the tape will start to unravel.

You’ll notice holes along the tape- usually they look kind of like little snowmen. One large hole connected to a smaller hole. You’ll pull the knot of the balloon through that larger hole, then, when it’s through, you’ll slide it into the smaller hole to lock it in place. Keep attaching a single balloon into each hole in the balloon arch tape. Once you get going, it will begin creating a nice balloon arch. As the balloons start taking up more room, you will notice it seems like you need to skip a hole. Instead of skipping a hole, use a smaller balloon (or two) and then continue with your regular-sized balloons.

I usually end up doing about 4-5 large balloons, followed by a small balloon.

Continue adding your balloons until your arch is as long as you would like it to be.

3. How to Hang up your Balloon Garland

I like to use a backdrop stand and fishing twine/stretchy bracelet twine to hang up my balloon garlands for my Cake Smash Sessions. First I set up my backdrop stand, then I tie twine in about 5-7 places along the horizontal bar. The shortest twine will go right in the middle (to make the top of the arch). Then I space my twine out evenly around that twine on each side, gradually lengthening my twine as I go.

Using quilting clips, I clip the arch tape to the twine. Then I step back and make sure my alignment is correct. If not, I can unclip whichever piece needs to be higher or lower and fix my arch.

If the entire arch is too high or too low, I can adjust the height of the backdrop stand instead.

4. Fill In

If you have any spots that seem a little bare, you can use extra balloons to fill them in. Take a little tape (or tape dots that often come with balloon arch tape sets) and adhere the extra balloons wherever you need them. Tape dots also work well for attaching other embellishments to the balloon arch.


DIY Balloon Garland (Balloon Arch) FAQ


How long does a balloon arch last?


Indoors, your balloon arch can look fresh for 2-4 days. Outdoors, expect 8–24 hours depending on weather. Keep your balloons out of heat and sunlight, and away from kids and pets.

How many balloons do I need for a balloon garland?

For my cake smash balloon garlands, I usually use about 75-80. For a full sized arch (around 8-10 feet), you may be looking at closer to 125 balloons. It really depends on the size of your balloons and how full you want your arch to be. I always suggest buying more balloons than you think you’ll need. It’s easier to fill in with matching balloons than to try to color match later.


Do I need helium to make a balloon arch?


Nope! Most balloon arches are made with air-filled balloons attached to a frame or fishing line. I do recommend blowing them up with a balloon pump, just to save yourself the headache of blowing up so many balloons.


Can I make a balloon arch the night before?


Yes, I do this all the time! In fact, I recommend doing this so you don’t have any last minute surprises. Do keep it indoors and away from heat or direct sunlight to prevent deflation.


Do you get blisters from tying all the balloons?


I can usually get through about one arch before I start hurting my fingers. To avoid this, I like to wrap my 2nd and 3rd fingers in electrical tape. It just seems to cling well and creates a buffer between the balloons I’m tying and my fingers. Otherwise they start to get rubbed raw.


What’s the easiest way to make a balloon arch?

Use a balloon strip for quick assembly—just pull the tied ends through the pre-cut holes and attach to your frame or tie up with fishing line.

I hope you found this guide helpful and that you’re excited to start your balloon garland!

Creating a balloon garland is a lot easier than it seems. I can usually whip one of these out in about 45 minutes. The part that takes the longest is just blowing up all of the balloons! Please feel free to leave any questions below. I’m happy to help!

December 18, 2024December 18, 2024

12 Best Indoor Photography Studio Rentals in Utah

Client Education

I’ve compiled a list of my favorite indoor photography studio rentals in Utah, and organized them by location to make them easier to compare. These studios are available for clients or photographers to rent (clients must hire and bring along their own photographer). I’ve also included details regarding studio size and lighting options, and what kinds of props are available for clients and photographers to use.

If you know of a studio that should be included in this list, feel free to leave a comment below or send me an email with a short description of why it should be included.

Utah County Indoor Photography Studio Rentals:


1. Blank Space Studios (American Fork)

This is my very favorite indoor studio to use in Utah County. It is located near I-15 and is on ground level, making it easy to access for clients of all ages and abilities. There are two different studio spaces available to rent, Studio A (which is the larger studio and is perfect for larger sized groups such as extended families– I’ve done a session with 25 here) and Studio B which is a great size for smaller groups.

They allow rentals by the hour and have a lot of great chairs and settees, which are really fun for family sessions. They have a large white grid wall that I love using for a background, as well as a rolling colored wall for smaller portraits. Large windows on the side let in plenty of light for natural light sessions, with sheer curtains to help control the amount of light in the room.

During the Christmas season they often will provide a Christmas tree with some other small Christmas decor.


2. The Loft Studio (Lehi)

The Loft Studio is another of my favorites, with large windows that let in plenty of light. There is this main open room with a pretty white slatted wall and barn doors, and then through the barn doors is a smaller, darker area with wooden shiplap walls on one side, and a painted accent area on the other side with a bed and a couch.

They also decorate for Christmas, and will typically list their holiday setup on their website. This is a great location for Christmas Minis.

indoor photography studio rentals in utah

3. The Art City Studios (Springville)

indoor photography studio utah county art city studios

Art City Studios in Springville, Utah is a beautiful indoor photography studio with natural light and lots of backdrop and prop options. They include a few spinning photography backdrop walls in different colors for smaller portraits, and have a lot of props available for use during your session. Although this space is large, I like it best for smaller groups that want a variety of backgrounds.


Shade Home and Garden (Orem) *BONUS LOCATION

While this isn’t your average indoor studio, I wanted to add it because I love doing sessions in this greenhouse! This area has a white cover, letting in gorgeous filtered light. They keep the inside arranged beautifully and have different sections in here with plants and seating (usually a couch or two). You do need to call ahead and schedule this (and it must be a time when they don’t have other events, as they host weddings and receptions frequently). They have a small photography fee to do sessions here. It’s best for smaller groups, as the walking area in the greenhouse is tight. They do have a larger area with a white wall as well.


Salt Lake County Utah Indoor Photography Studio Rentals:


4. Life + Style Studio (Draper)

Life + Style allows studio rentals, and I just love this textured wall! While this studio has less variety than many others, it is a great space for smaller groups that want something simple.

5. Birdhouse Studios (West Jordan)

indoor photography studio rentals in utah

Birdhouse Studios is a natural light studio in West Jordan, with windows perfect for afternoon and evening sessions. They have a variety of props to use during sessions, as well as a couple of backdrops to choose from. Rentals are by the hour and can be scheduled on their website.


6. Studio Elevn (Salt Lake City)

The Studio

indoor photo studio salt lake county

Studio Elevn offers two rental options for photo or video sessions. This first option is the photo studio, with some beautifully decorated spaces for portraits. With 14′ ceilings, this studio offers a luxury feel for your photo sessions.

The opposite side of the studio has a large white background with some nice window light, perfect for natural white photos.

The Flat

Studio Elevn also has a flat for rent, which is perfect for lifestyle photo sessions or video. Warm tones and lots of light make this a gorgeous location for portraits with a cozy feel.


7. Photopia Studios (Cottonwood Heights)

utah photo studio rental photopia

Photopia Studios in Cottonwood Heights is a natural light studio with plenty of light in a mid sized studio. It offers a lot of background options for a cozier space, and I recommend this studio for smaller groups who would like some variety in their backgrounds. Cute props help your photos really pop, and this space does decorate for Christmas.


8. Wild Willow Studios (Salt Lake City)

Wild Willow Studios in Salt Lake City is a great rental for families that need a small, cozy space. This would be a beautiful location for indoor lifestyle newborn sessions, as you could get photos of your family in the white bed together and also use this cute cradle and gray sitting area. It’s a smaller studio, but the area available is perfect for this type of session.


9. UWest

Salt Lake City photography studio rental

While UWest packages start at two hour increments, it’s a beautiful space with a lot of potential for photo or video sessions. There are so many applications for this open, interior designed space, and I love how large it is.


Davis County Utah Indoor Photography Studio Rentals


10. Light Loft Studio (Layton)

utah indoor studio rental space

The Light Loft Studio in Layton has a huge variety of props, and a nice open space for portrait sessions. I love that they offer a crib in their rental, as this is a great option for a more lifestyle session for newborn sessions. They also offer really beautiful Christmas setups for Christmas mini sessions.

utah indoor portrait studio rental

Washington County Utah Indoor Studio Rentals


11. Photo Loft (St George)

This indoor natural light studio is a great option for small groups who are looking for a simple background. It’s a cozy space, perfect for a small family or individual photos.


12. White Space Studios (Santa Clara)

Santa Clara’s White Space Studios is such a gorgeous studio, especially for lifestyle family sessions in this amazing kitchen! It also offers a living area and pull down backdrop for individual portraits.


I hope you found this list of indoor studios helpful! I know there are a few more available in these areas, so if you didn’t find what you need be sure to look around and see if you can find some more. I only included studios that fit my style and have what I feel like is enough space to have a good session experience.

Looking for a photographer? I’d Love to do your session! Click here to contact me.


  • portrait session outfits style guide what to wear
    Client Education

    5 Easy Tips When Deciding What to Wear for Pictures

    Read More 5 Easy Tips When Deciding What to Wear for PicturesContinue

  • where to print your portraits
    Client Education

    Where to Print Your Pictures and Why Does it Matter?

    Read More Where to Print Your Pictures and Why Does it Matter?Continue

  • how to choose a photographer
    Client Education

    How to Choose a Photographer

    Read More How to Choose a PhotographerContinue

Search

Browse by Category

  • Client Education
  • Education
  • Photographer Education
  • Session Advice AGES
  • The Everyday
  • Uncategorized
Serving Clients in Utah County, Provo, Orem, Vineyard, Lehi, American Fork, Draper, Sandy, Herriman, Saratoga Springs, Mapleton, Spanish Fork, Payson, Heber, Park City, and through the Salt Lake City, Utah area

© 2025 Rebecca Kayne Photography LLC.  801-369-2159

Scroll to top
  • Home
  • About
  • Maternity
  • Newborn
  • Cake Smash
  • Other Sessions
    • Milestone
    • Princess Sessions
    • Weddings
    • Family
    • Mini Sessions
  • Products
  • Blog
  • Contact
Search